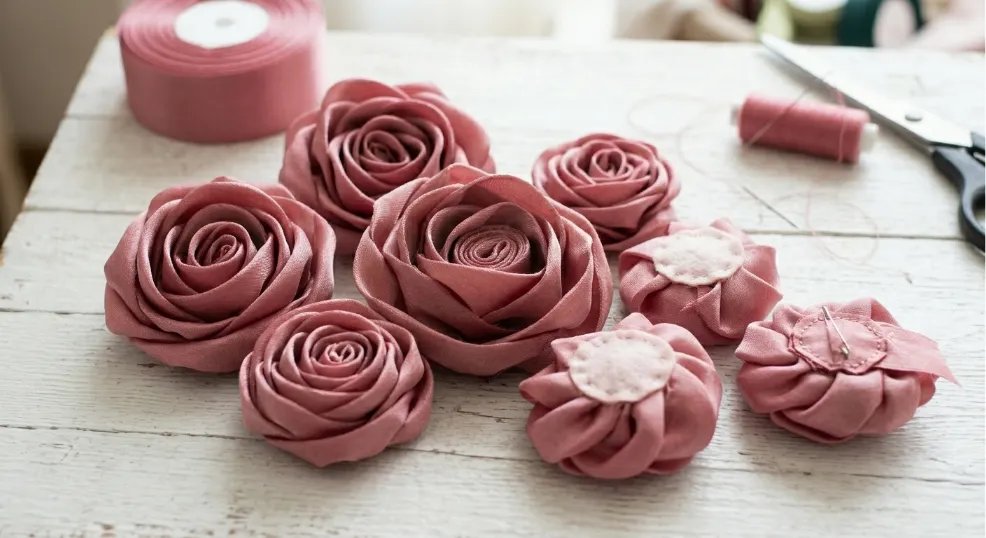
Crafting a flower out of silk or satin ribbon is a timeless, budget-friendly project that instantly elevates your home decor or gift wrapping. As you can see in the photos of our dusty rose blooms, the final result looks intricate but relies on a deceptively simple fold-and-roll technique. Grab a few basic supplies from your stash and let’s start rolling.
Essential Materials for Your Ribbon Rose
Having the right tools ready on your table makes this project entirely frustration-free. Gather these items before you start folding:
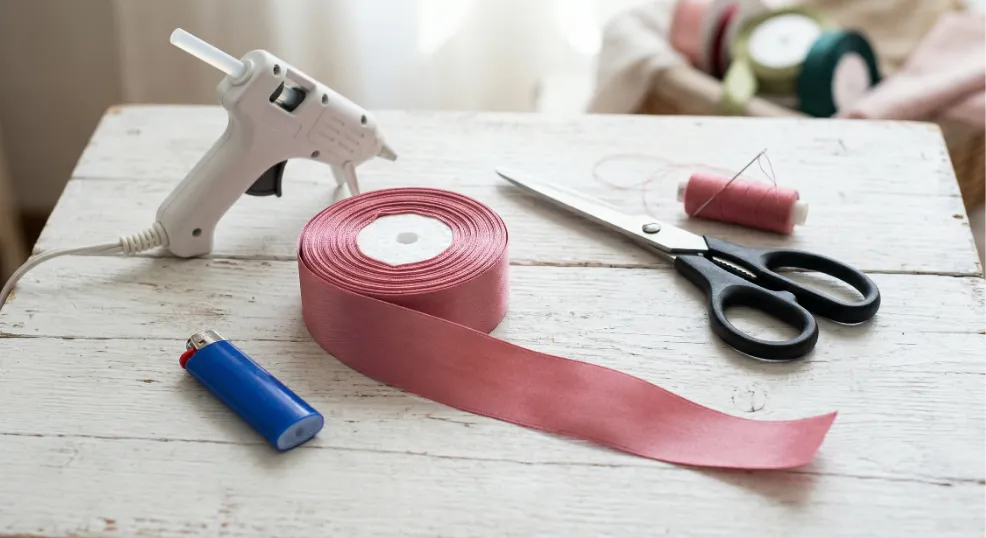
- Silk or satin ribbon measuring about 1 to 1.5 inches (2.5 to 3.8 cm) wide.
- Sharp fabric shears. A crisp cut prevents fraying, so I always recommend checking out our best steel craft scissors hardness guide if you need a reliable pair.
- A needle and matching colored thread.
- A hot glue gun.
- A standard lighter, like the blue one in my pictures, to melt and seal the ribbon edges.
- Small felt or fabric circles for the structural backing.
Step-by-Step Ribbon Flower Instructions
Follow along with my hands-on photos to master this fold-and-roll technique. It takes a little practice, but your hands will quickly learn the rhythm.
Step 1: Measure, Cut, and Seal the Edges
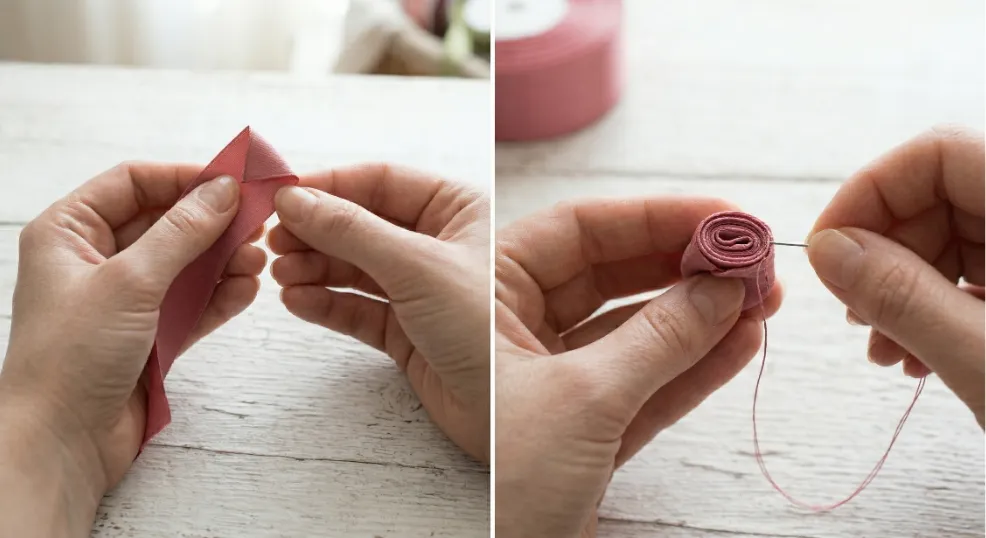
Cut a piece of your ribbon measuring roughly 12 to 20 inches (30 to 50 cm) long. A longer strip will yield a wider, more open bloom, while a shorter piece creates a tight little bud. Quickly run the raw edges near the flame of your lighter to melt the fibers slightly and lock them against fraying.
Step 2: Form the Tight Center Bud
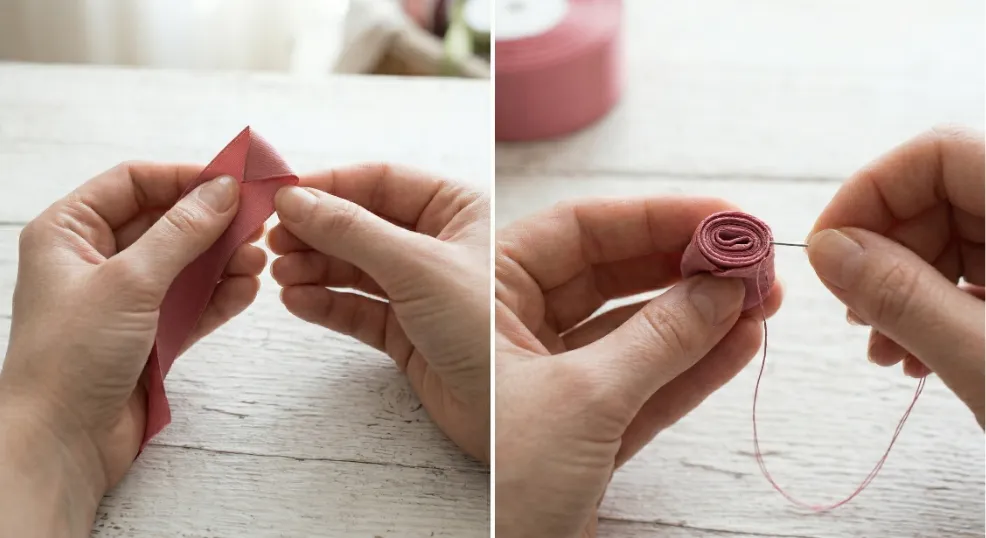
Take one end of your prepared ribbon and fold the top corner down to create a small triangle. Roll this folded edge inward tightly two or three times to build the solid core, or bud, of your rose. As you can see in my close-up shot, I prefer to run a needle and matching thread through the base to lock this bud securely in place.
Step 3: Fold and Shape the First Petals
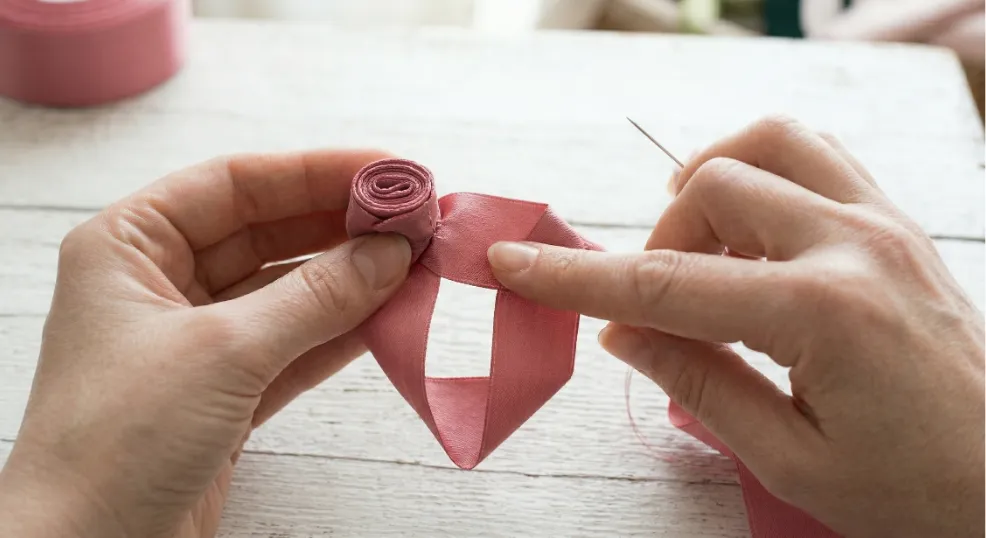
Hold your finished center bud firmly at the base with one hand. Use your free hand to fold the long ribbon tail backward and outward, forming a sharp 90-degree angle. Roll your center bud directly across this fold to wrap the ribbon around the core, creating your very first petal.
Step 4: Build the Bloom
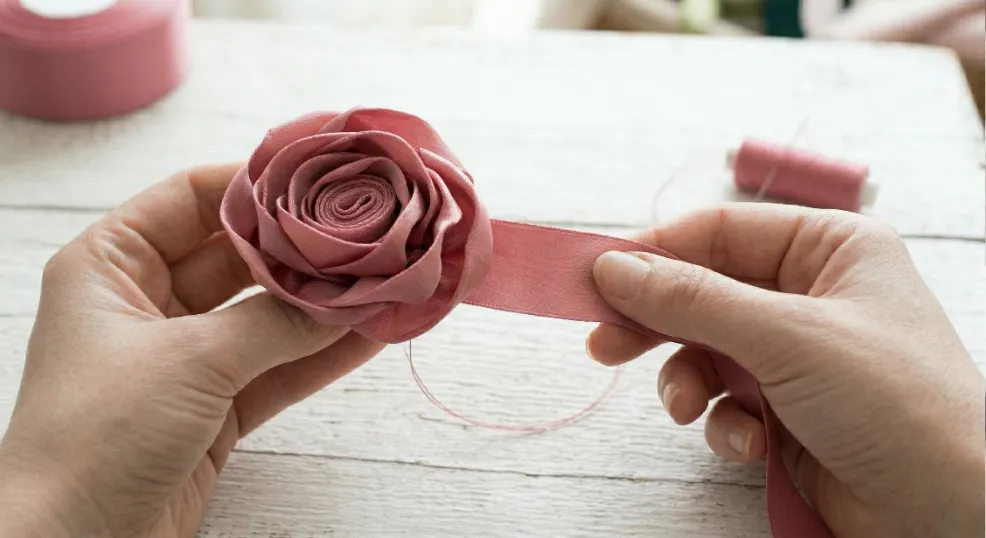
Keep repeating the exact same motion of folding the ribbon outward and rolling the bud across it. Secure the base with a tiny stitch or a small dab of hot glue after every full rotation to keep the structure stable. As your flower grows wider, loosen your wrapping tension slightly to give the outer petals a lush, naturally blooming appearance.
Step 5: Attach the Secret Felt Backing
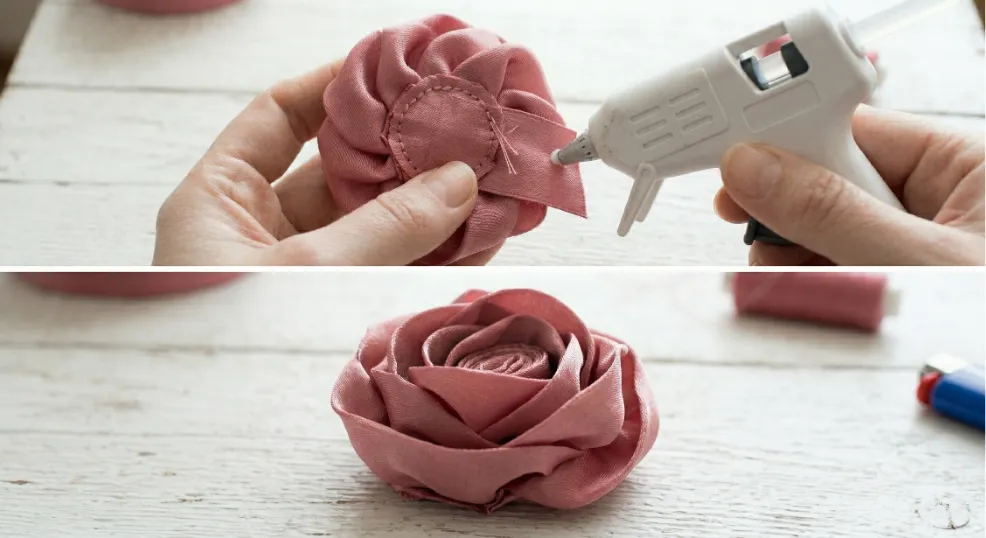
Looking at my finished flowers lying face down, you will notice a small fabric circle glued to the bottom. Once you reach the end of your ribbon, fold the final tail under the base and trim any excess. Apply a generous ring of hot glue to your backing circle and press it firmly against the raw base to seal all the folds permanently.
Creative Ways to Use Your Finished Flowers
These handmade ribbon roses are incredibly versatile for budget-conscious eco-crafters. You can attach them to barrettes for custom hair accessories or glue them onto rustic twine to elevate your wrapped gifts without buying plastic bows. They also look stunning clustered together in a shadow box or glued to a decorative wreath for a handmade touch.
Master Your Ribbon Crafting Skills
Making your own ribbon flowers is a rewarding way to transform cheap materials into elegant decor. Once you master the basic fold-and-roll rhythm, you can experiment with different ribbon widths and textures to create an entire indoor garden. Grab your supplies, fire up that glue gun, and start bringing your DIY floral visions to life.